Improve your kicks with kicking shields
Kicking Shield Training: Techniques, Combos, and How to Get the Most From Every Session
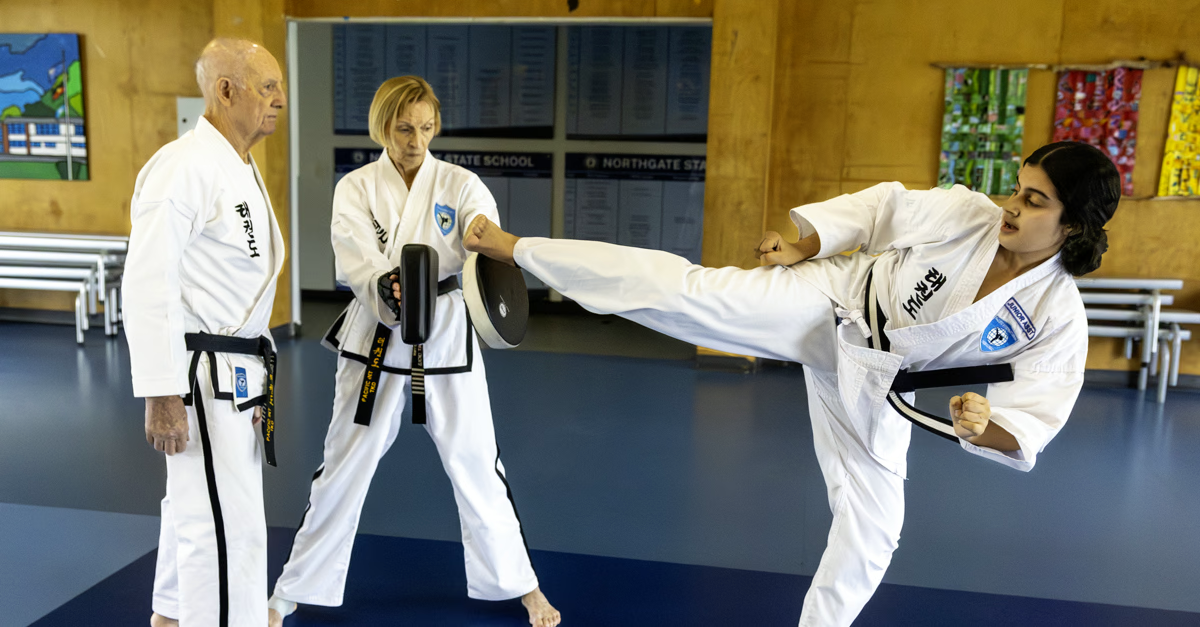
A kicking shield gives you something a heavy bag can’t — a partner who moves, adjusts, and gives you honest feedback on every kick. That interaction is what makes kicking shield training so effective. But like any tool, you get out what you put in. Sloppy technique at full power just builds bad habits faster. This guide covers the kicks, the combos, the holder’s role, and how to structure a session that actually develops your striking.
Before you start: technique before power
The order matters. Technique first, speed second, power third. Every kick in this guide should be learned slowly and cleanly before you add intensity. Ten well-executed kicks teach you more than fifty sloppy ones. Your partner should give you honest feedback from the start — if your kick is landing off-centre or your balance is off, you need to know immediately, not after you’ve grooved the wrong pattern for a month.
Warm up properly before any shield work. Light jogging, jump rope, and dynamic hip and leg stretches prepare the muscles you’re about to use hard. Shadow kicking — practicing kicks in the air without a target — is also useful to get the movement pattern firing before you add impact.
Individual kicks: what to focus on
Front kick
Have your partner hold the shield at chest height. Drive your knee up first — the chamber is where the kick starts, not the extension. Then snap your foot forward, striking with the ball of your foot in a straight line. Retract the leg along the same path it traveled. Practice at three heights: low (around knee level), mid (solar plexus), and high (head level). Each height requires different hip positioning and balance — don’t just reach for height without adjusting your whole body position to match.
Roundhouse kick
Your partner should angle the shield to match the circular arc of the kick. Pivot on the ball of your standing foot and rotate your hips — this is where the power comes from, not your leg. Strike with your instep or shin depending on your discipline. Let the kick complete its natural arc rather than pulling it back prematurely. The most common mistake with roundhouse kicks is muscling it with the leg while the hips stay square. If your hips aren’t rotating fully, the kick has no real power behind it regardless of how hard your leg is working.
Side kick
Your partner needs to brace well for this one — it’s the most linear and often the most powerful kick when done correctly. Chamber your knee toward your chest, then push straight out with your heel, striking with the blade of your foot. At full extension, your hip, knee, and ankle should form a straight line. Practice quick succession side kicks — left, right, left — to build speed and endurance. For advanced practitioners, the flying side kick requires the holder to be positioned with a solid stance and ready for significant impact.
Back kick
Turn your back to the shield briefly, spot your target over your shoulder, then drive your heel straight back like a piston. The power comes from the push of the hip, not a swing of the leg. Balance on your standing leg is critical here — if your core isn’t stable, the kick loses both power and accuracy. Your partner should be ready for a direct, forceful impact rather than a circular one.
Hook kick
Bring your leg up as if beginning a side kick, pivot on your supporting leg approximately 180 degrees, then snap the kicking leg around in a circular motion, striking with your heel. If done at head height with the heel landing at the temple, this is one of the more devastating kicks in the arsenal. The spinning hook kick is a variation worth practicing once the basic version is solid — coordinate with your partner beforehand on the height and angle they should hold the shield.
Axe kick
Your partner can sit in a chair and hold the shield overhead, or stand and hold it high. Raise your leg as high as your flexibility allows — flexibility is the limiting factor here, so don’t sacrifice form by straining for height before you’re ready. Once at height, drive your heel down forcefully in a chopping motion. Don’t just let gravity do the work — actively drive the heel downward. Keep your upper body upright throughout. This kick uses gravity as part of its power, which makes it particularly effective against shorter opponents.
Teep kick
The teep is often mistaken for a front kick, but it serves a different purpose. Where a front kick strikes with the ball of the foot, the teep uses the sole to push the opponent away and create distance. It’s primarily used in Muay Thai but is practical for any striking art. Practice it on the shield to feel the difference in intention — you’re pushing rather than penetrating. Use the distance created by a teep to set up a follow-up high kick.
Six kick combinations worth drilling
Once individual kicks are solid, combine them. Your partner moves the shield accordingly — sometimes they’ll preset the height, sometimes they’ll change it without warning to sharpen your reflexes. Here are six combinations that work across disciplines.
Two consecutive same kicks. Execute any kick and immediately follow with the same kick. For example, two roundhouse kicks in sequence — the first to the midsection, the second to the head. This builds speed and conditions the muscles for repeated efforts.
Alternate leg same kick. Front kick with the left leg, immediately followed by a front kick with the right. Start both at the same height, then progress to different heights for each leg. This develops bilateral balance and coordination.
Front kick into roundhouse kick. The front kick opens the combination; the roundhouse finishes it. Your partner holds the shield for the front kick, then adjusts the angle for the roundhouse. The partner can vary the height of the shield between kicks without warning — reacting instantly to the new position sharpens your reflexes significantly.
Teep kick into high kick. The teep pushes the shield away, creating distance. Use that distance immediately to deliver a high kick. This combination teaches you to read and use the space created by a push kick — a key tactical concept in Muay Thai and sport Taekwondo.
Side kick into back kick. Execute a side kick to the midsection, then use the pivot momentum to drive a back kick. The distance created by the side kick sets up the back kick naturally. This is a flowing combination once the timing is right, but requires your partner to reposition quickly between the two kicks.
Low kick into spinning hook kick. Drive a low kick aimed at leg level, then use the rotational momentum of that same motion to spin and deliver a spinning hook kick to the mid or high section. The low kick isn’t about power here — it’s about creating the momentum and direction for the spin. This is an advanced combination that requires good hip flexibility and control.
The holder’s role
Holding the shield is not a passive job. Stand with your feet shoulder-width apart, knees slightly bent, with your elbows slightly bent to absorb impact rather than locking out your arms. Hold the shield firmly against your body for kicks that drive straight in; hold it at an angle for circular kicks like roundhouse and hook kicks.
Your feedback after each kick matters as much as the kick itself. Was it centred? Was the power there? Did the technique look right from where you’re standing? Tell your partner specifically what you noticed — “your hip didn’t rotate,” or “that landed on the edge, not the centre” — rather than just nodding. A holder who gives precise feedback is a far more valuable training partner than one who just stands there.
Switch roles regularly. Holding the shield teaches you about different kicks from an angle you can’t see when you’re throwing them. You’ll understand why hip rotation matters when you feel the difference between a kick driven by hips versus one driven only by the leg.
Breathing
Exhale sharply with every kick. This isn’t just about habit — breathing correctly helps you generate power and maintain focus through a long combination. Holding your breath through a drill is a fast way to fatigue unnecessarily. Kiai in Taekwondo and Karate, or the sharp exhale of a Muay Thai fighter, both serve the same mechanical purpose: engaging the core and releasing force efficiently at the moment of impact.
Structuring a session
Start with technique work at low intensity — clean kicks on a stationary shield with your partner holding still. Once form is consistent, introduce movement: your partner takes steps forward, backward, or sideways between kicks so you’re tracking a moving target. Add combinations once individual kicks are landing well. Finish with conditioning rounds — high-volume kicking at pace, designed to build endurance rather than technique.
Communicate with your partner before every drill, particularly spinning and jumping techniques. Your partner can’t always see what’s coming, and a powerful spinning kick landing unexpectedly is how holders get hurt.
Frequently Asked Questions
Can kicking shields be used for punching and knee strikes?
Yes — that’s why they’re also called multipurpose pads. The large striking surface and thick padding handle punches, knee strikes, and elbow strikes effectively. For punch-specific training, focus mitts give the holder better control and a more appropriate target size, but for combination work that mixes kicks and hand techniques, the kicking shield handles both.
How do I know if my kick is actually powerful?
Your partner’s feedback is the most reliable indicator. A well-executed kick with good hip rotation and proper technique should push the holder back noticeably even through the padding. The sound of the impact also tells you something — a flat, centred kick sounds and feels different from a glancing or off-centre one. If your partner is barely moving, the issue is usually hip rotation or insufficient body weight committed to the kick.
Should I always kick at full power?
No. Technique training should be done at 50–60% power so you can feel what’s happening and make corrections. As technique becomes automatic, gradually increase to 80%, then full power. Kicking at full power with poor technique just reinforces the poor technique faster. Full power rounds have their place — conditioning and stress-testing your technique under fatigue — but they shouldn’t be where you spend most of your training time.
How often should I train with kicking shields?
Two to three shield sessions per week is enough for most practitioners when combined with other training. More than that without adequate recovery tends to accumulate fatigue in the hip flexors and supporting leg muscles. Listen to your body — if your kicks are getting sloppier through a session rather than sharper, that’s a sign to stop and recover rather than push through.
What’s the difference between a kicking shield and a paddle for kick training?
Kicking shields are built for power and full-force kicks — they’re thick, large, and heavily padded for the holder’s protection. Paddles are smaller, lighter targets designed for accuracy, timing, and speed work. Paddles develop precision; shields develop power. Both have their place in a complete training program — use paddles for sharp technique and quick combinations, shields for developing the force behind those techniques.
Do I need a partner to train with a kicking shield?
For most drills, yes — the shield needs to be held. Solo training with a heavy bag develops some of the same attributes, but you lose the movement, the feedback, and the reactive element that makes shield training valuable. If you train at home without regular access to a partner, a heavy bag is a reasonable substitute for conditioning work, but it doesn’t replicate what a held shield provides for technique development.