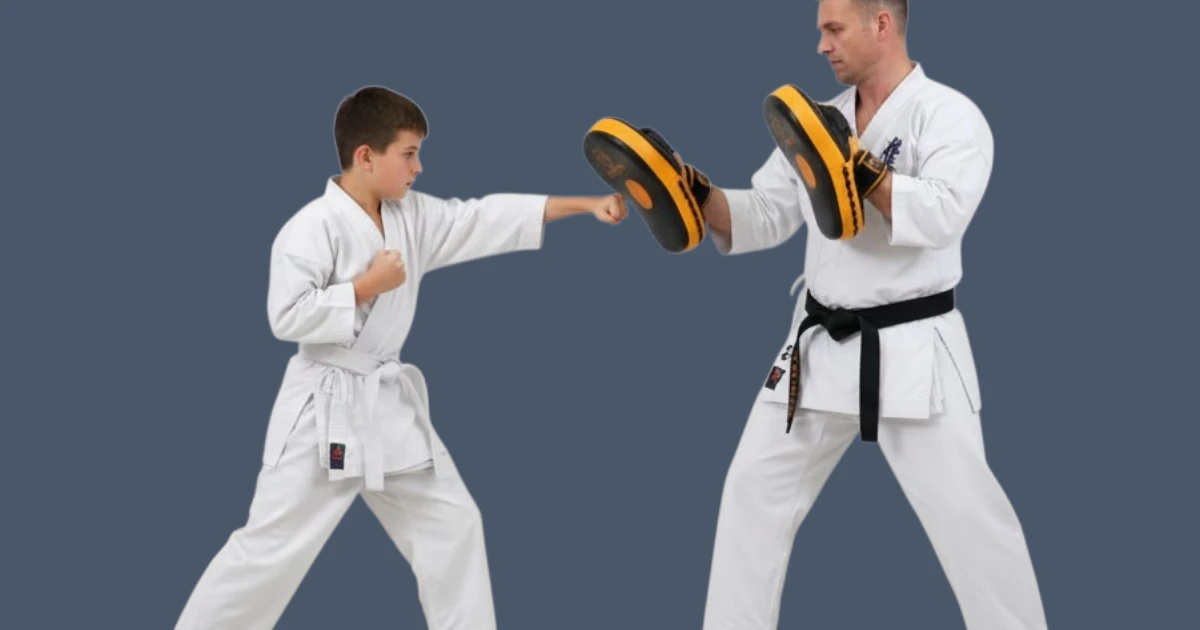
Focus mitt drills and holder technique guide
Focus Mitt Training: A Complete Guide to Focus Mitt Drills Martial Arts, Holder Technique, and Getting the Most From Every Session
Focus mitts are one of the most effective training tools in striking martial arts — but only when used properly. The problem is that most people use them as a passive target. One person holds, the other punches. That’s it. Done well, mitt training is interactive, reactive, and develops both attack and defence simultaneously. This guide covers the equipment, the holder’s role, the drills, and how to structure sessions that actually build skill.
Incorporating focus mitt drills martial arts into your training can significantly enhance your skills and responsiveness.
A brief history
The concept of a training partner holding a target for a striker to hit goes back centuries. Early martial artists used whatever was available — slippers, foot tongs, small pillows — held by a partner to absorb the shock of strikes. The modern focus mitt evolved from these improvised tools: high-density foam padding covered in leather, shaped and sized specifically for partner striking drills. Today they’re standard equipment in boxing, Muay Thai, Kickboxing, Karate, Taekwondo, MMA, and most other striking disciplines.
Focus mitts, focus pads, and paddles: what’s the difference?
These three tools are often confused, and using the wrong one for a drill limits what you get out of it. Focus mitts are worn on the holder’s hands like gloves and are primarily used for punch training. The holder’s hands are free to move independently, which allows realistic combination calling and counter-striking. Focus mitts are the tool of choice when the session emphasis is on hand techniques — jabs, crosses, hooks, uppercuts — and defensive response drills. Focus pads are larger handheld targets — not worn, but gripped — that accommodate punches, kicks, knee strikes, and elbow strikes. They’re more versatile than focus mitts for mixed technique sessions but less nimble for pure punching drills. Paddles are smaller, lighter targets used primarily for kick training — accuracy, timing, and speed work for the feet rather than the hands. For a complete striking training setup, all three serve different purposes and none fully substitutes for the others.
Offensive and defensive development
The most underutilised aspect of mitt training is its defensive potential. Most practitioners focus on the striking side — throwing combinations at the mitts — and treat the holder as a passive target. But focus mitts allow both practitioners to develop simultaneously. On the offensive side, mitt training develops power, precision, combination flow, speed, and accuracy in a way that bag work can’t replicate — because the target is held by a person who moves, adjusts height and angle, and gives immediate feedback. On the defensive side, the holder can throw the mitts back at the striker — light, controlled strikes that the striker has to slip, roll, parry, block, or avoid. This single addition transforms a striking drill into something much closer to actual sparring. The striker practices footwork, defensive movement, and counter-attacking all within the same drill. A good holder who actively engages the striker defensively is worth significantly more than one who just holds still.
The holder’s role: technique matters as much as the striker’s
Holding focus mitts is a skill in its own right. Poor holding technique means the striker gets bad feedback, and both partners risk injury.
Know the punch type before it arrives
The holder needs to understand what punch is coming and position the mitt accordingly before the strike lands — not react to it after. A jab travels in a straight horizontal line and needs the mitt aligned flat to meet it. A hook travels on a curved horizontal path and needs the mitt turned to face the arc. An uppercut travels upward and needs the mitt angled down to receive it cleanly. Misaligned mitts mean off-centre impacts that strain the holder’s wrist and give the striker misleading feedback about their technique.
Align with path and trajectory
Each punch has three elements the holder must read: the type (jab, cross, hook, uppercut), the path (horizontal, vertical, diagonal, curved), and the trajectory (the height, angle, and speed at which it travels). Getting all three right means the mitt is in exactly the right position when the punch arrives. This takes practice — new holders should start with pre-called combinations so they can prepare, then progress to reactive holding as their reading improves.
Grip and resistance
Hold the mitts firmly enough to absorb impact without straining your wrist, but not so rigidly that your arm locks out. The holder should move the hand slightly forward to meet the incoming punch — this creates resistance that gives the striker meaningful feedback about their power and technique. A mitt that just absorbs passively tells the striker little. A mitt that meets the punch and resists it tells them exactly how much force they generated.
Give feedback constantly
Your job as the holder isn’t just physical — it’s coaching. Tell the striker where they’re landing off-centre. Tell them when power drops off during a combination. Tell them when their guard dropped between strikes. Real-time feedback during the drill is far more valuable than a debrief at the end.
Attack as well as receive
Once comfortable with holding, start incorporating counter-strikes — light throws with the mitt toward the striker’s head or body that they have to defend. Call combinations and then immediately counter. This keeps the striker honest about their guard and develops the defensive habits that pure attacking drills never build.
Switch roles
Both partners should hold and strike in every session. Holding teaches you about striking from an angle you can’t see when you’re throwing, and it develops the coaching eye that makes you a better training partner over time.
Focus mitt drills
These drills build from simple to complex. Start new practitioners at the 1-Drill and progress only when the current level is clean and consistent. For right-handers, the right hand is the lead hand; for left-handers, the left hand leads.
1-Drill
One movement — either a single attacking or defensive technique practiced repeatedly. The most common version is the straight punch drill: the striker throws straight punches with the lead hand for a set count, then repeats with the non-lead hand. The alternate version has the striker throwing straight punches with each hand in alternating fashion. This drill develops basic fist formation, distance judgment, and the habit of returning to guard after every strike.
1-2-Drill
Two movements in sequence. The most common version is the jab-cross: the striker throws a jab followed immediately by a cross. Variations include one-hand jab-cross (both punches with the lead hand, then both with the non-lead), and alternate-hand jab-cross (jab with the non-lead, cross with the lead, alternating). More advanced versions incorporate defence — a slip followed by a counter, or a body shot followed by a head punch. The 1-2-Drill develops combination flow, rhythm, and the transition between lead and rear hand.
1-2-3-Drill
Three movements. The jab-cross-hook is the most common: jab and cross with the non-lead hand, followed by a hook with the lead hand. The straight-slip-counter is more advanced: the striker throws a straight punch, the holder returns a jab or cross, the striker slips it and counters with a hook or cross. This drill develops the attack-defend-counter rhythm that underpins most effective striking.
Multiple-steps drill
The trainer designs a multi-step sequence tailored to the student’s current needs. A nine-step drill that works well for developing overall fluidity: Step 1: Jab with lead hand. Step 2: Cross with non-lead hand. Step 3: Hook with lead hand. Step 4: Uppercut with non-lead hand. Step 5: Trainer throws a jab — striker slips outside it. Step 6: Trainer throws a hook — striker rolls under it. Step 7: Trainer throws an uppercut — striker weaves under it. Step 8: Striker shuffles back out of range. Step 9: Striker shuffles forward back into range and repeats from Step 1. This nine-step drill covers four attacking movements, three defensive movements, and two footwork movements in a single continuous sequence. Practice it slowly until the sequence is memorised, then gradually increase speed. Stay on the balls of the feet throughout and maintain fluid movement between steps — don’t stop and reset between each one.
Call-out drill
The holder calls combinations verbally and randomly — “1”, “1-2”, “1-2-3”, “9-steps” — without any predictable pattern. The striker must listen, process, and execute without anticipating what’s coming. This is the most demanding drill for reaction time and attentiveness, and the closest mitt training gets to the unpredictability of actual sparring. It should only be introduced once all the individual drills are clean and automatic.
What to look for in focus mitts
The quality of the mitts directly affects the quality of the training. Poor mitts give inconsistent feedback and break down under sustained use. Shock absorption is the primary requirement. The padding needs to absorb the force of powerful strikes without transferring that force to the holder’s hands and wrists. High-density foam filling distributed evenly through the mitt handles this — thin or uneven padding creates hotspots where impact concentrates. The outer leather needs to be tough enough to withstand thousands of strikes without surface degradation. PU leather is the standard for quality training mitts — it holds up to sustained use and is easy to wipe clean. The holding system on the back of the mitt matters as much as the front. Comfortable finger slots, a wrist wedge for support, and a wide Velcro strap that holds the mitt securely without cutting into the wrist all reduce fatigue during long holding sessions. A holder whose hands are uncomfortable stops giving good feedback — good holding hardware keeps the focus on the training rather than the discomfort. A curved shape rather than a flat one improves functionality for hooks and uppercuts — the curve meets the natural arc of those punches more cleanly than a flat surface does.
Care and maintenance
Wipe down your focus mitts after every session — not just the striking surface, but the back, sides, handles, straps, and loops. Sweat and dirt accumulate in every surface and crevice, and left uncleaned they become a breeding ground for bacteria. A damp cloth followed by a dry cloth handles routine cleaning. Leave them to air dry fully before storing — sealed in a bag while still damp accelerates odour development and material degradation. Don’t store focus mitts in direct sunlight for extended periods as UV exposure dries and cracks leather over time.
Frequently Asked Questions
Do I need special gloves for focus mitt training?
Boxing gloves or MMA gloves both work for mitt training. Boxing gloves provide more padding for sustained combination work and protect both the striker’s hands and the holder’s mitts from excessive wear. MMA gloves allow better dexterity for mixed drilling that includes grappling elements. For pure striking combinations on mitts, boxing gloves are the more appropriate choice.
How long should a focus mitt session be?
Three-minute rounds with one-minute rest mirrors competitive round structure and works well for mitt training. Beginners can start with two-minute rounds. A complete session of four to six rounds is sufficient for most practitioners — quality of focus and technique drops significantly in later rounds when fatigued, and drilling with poor technique reinforces poor technique. Stop when form deteriorates rather than pushing through sloppy rounds.
Should the holder move around or stay stationary?
Both, depending on the drill goal. Stationary holding allows the striker to perfect technique without the added variable of tracking a moving target — this is where new combinations should be learned. Moving holding develops timing, distance judgment, and the ability to strike effectively while both practitioners are in motion. Progress from stationary to moving as technique becomes consistent.
Can focus mitts be used for kick training?
Focus mitts can be used for some kicking drills — low kicks and light round kicks where the holder has good control of the mitt position. For powerful kicks and high kicks, focus pads or kicking shields are more appropriate — they provide the surface area and padding needed to safely absorb full-power kicking strikes. Using focus mitts for heavy kicking risks injury to the holder’s hands and wrists.
How do I know if my combination is landing correctly?
Your holder’s feedback is the primary indicator. A clean, centred punch landing with proper technique sounds and feels different from a glancing or off-centre one. The holder should tell you immediately if punches are landing off-centre, if power drops between strikes, or if your guard is dropping between combinations. If your holder isn’t giving you this feedback, ask for it explicitly — real-time correction during the drill is far more effective than discussing it afterwards.
How often should I clean focus mitts?
After every session. The bacteria and fungi that develop in training equipment are the same ones responsible for skin infections — cleaning your mitts protects you and your training partners. A damp cloth wipe-down takes two minutes and extends the life of the leather significantly. Mitts that are regularly cleaned and air-dried last several years of heavy use; mitts left sweaty in a bag degrade in a fraction of that time.